Winter Wonder…craft?

Well folks, the year is coming to a close and although my posts have been few and far between, it still set the stage for my baking platform.  It lit a fuse in my baking that has just turned into a huge flame.  Despite the fact that I gave up on my baking challenge posts (I believe I was going to do like 30 weeks of baking), I am sure I surpassed that baking goal by far.  So without further ado, I post my last blog of the year just in time for the holidays.

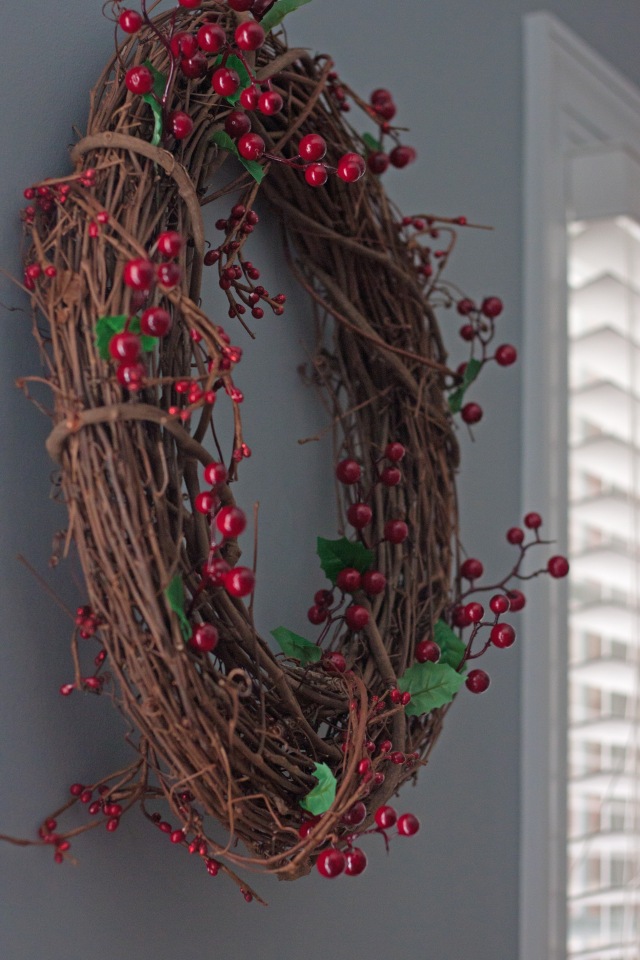
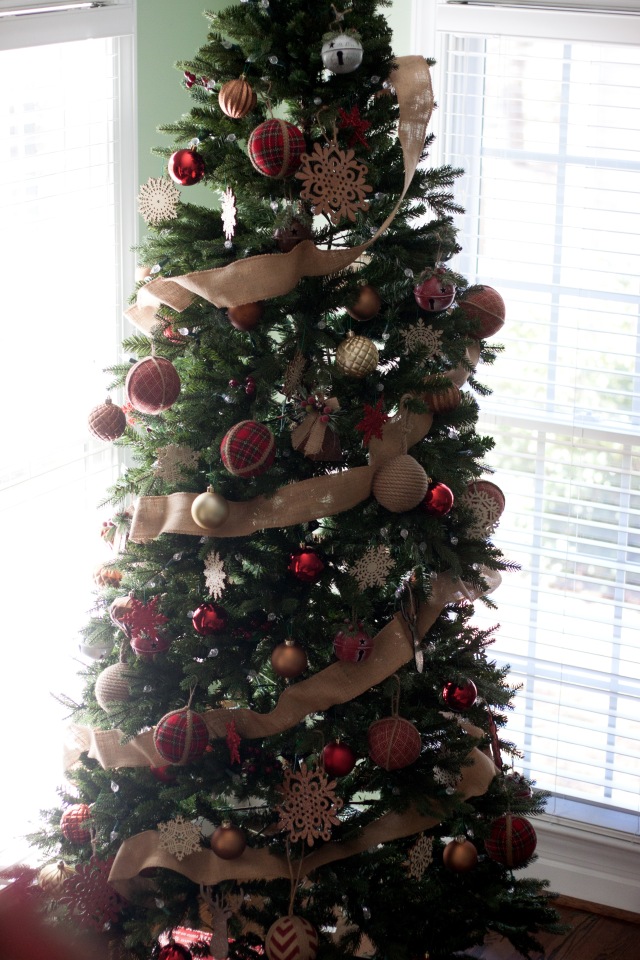
My Christmas decor theme (oh yes, there must always be a theme) was winter wonderland which meant everything would be white….well white with a bit of a rustic touch.  I mean who would I be without my rustic decor.  I could not wait to decorate this year as it was the first time I had ever done white.  It turned out wonderfully with the tree being my favorite.  And in keeping up with the theme of the house, this year’s kids’ party would be centered around a snowy Christmas.

IMG_9028

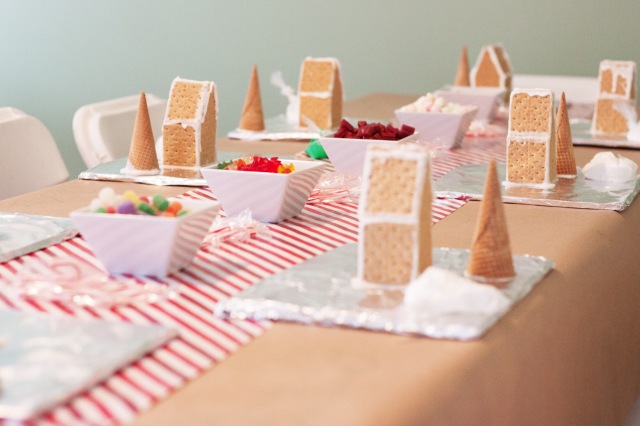
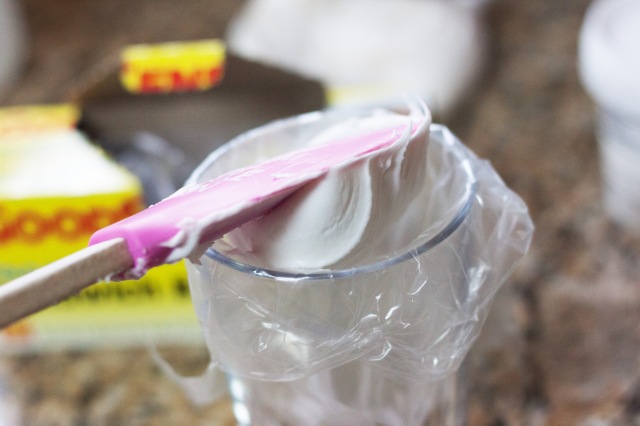
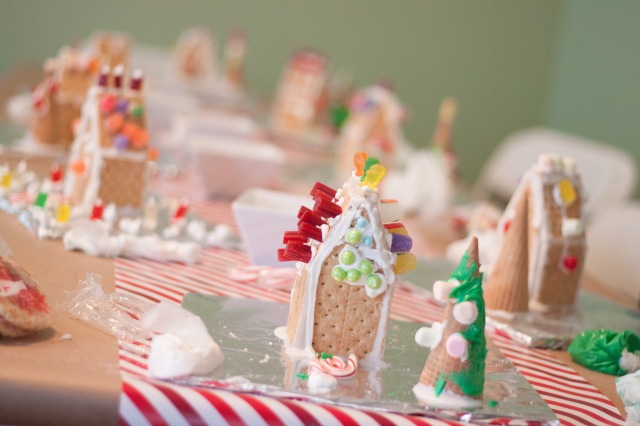
The kids picked an abominable snowman as their craft and we figured why not use marshmallows.  We also chose a more simpler and less messy set up with food coloring pens and toothpicks for connecting.

IMG_9024

As with the last Christmas craft party, the only food would be an obnoxious amount of desserts and hot chocolate, but not just any chocolate…this year is was white hot chocolate.

IMG_9019

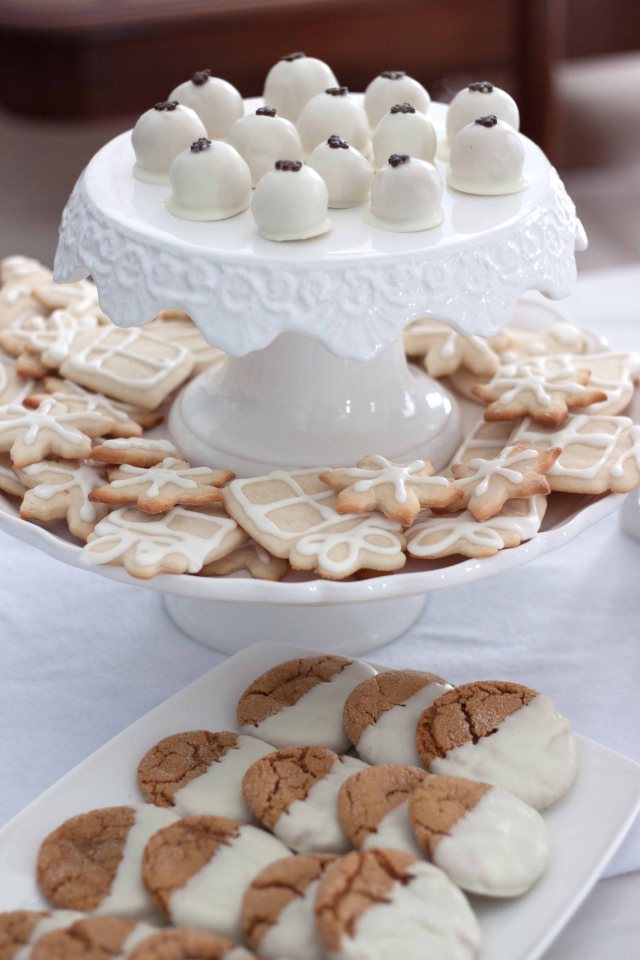
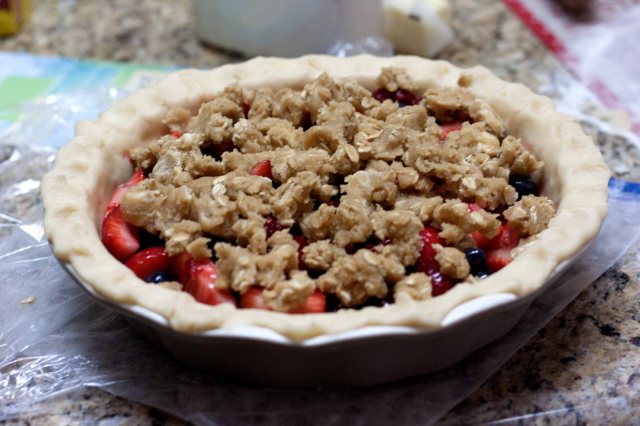
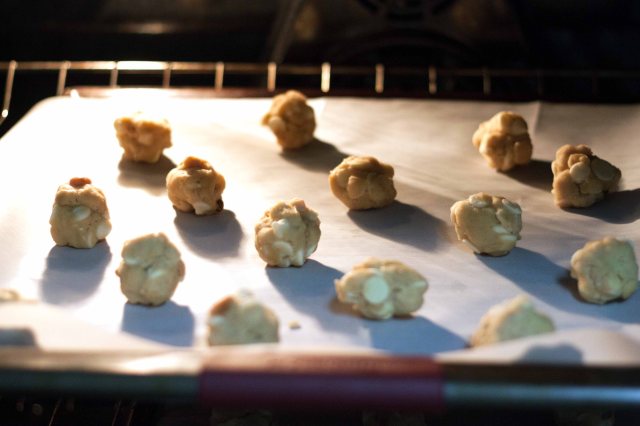
I selected desserts that were only in a white hue, from a coconut cake to white chocolate truffles.  When it came to preparing the truffles, I was tapped out on all the molasses so I opted to replace the molasses with maple syrup and for the seasoning I used pumpkin by spice.  They were amazing.  Just be sure to tell your guests that it is a truffle so they can prepare for the creamy center rather than a hard cookie.  There is nothing like an unexpected texture or am I the only one that gets freaked out by that kind of surprise?

IMG_9018

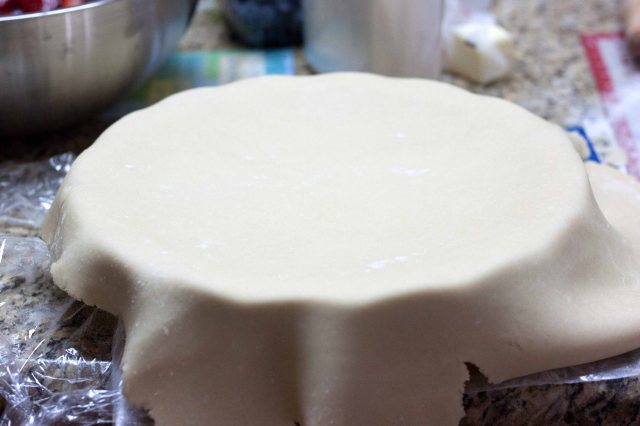
As always I prepared the cakes well in advance and froze the layers.  Please invest in non-tapered cake pans and the Wilton cake strips or cake diapers as my husband calls them.  The layers come out gorgeous and there is no cutting off of a dome.  I guess that’s unfortunate if you like snacking on the cake pieces.


The gingerbread cake  (Unfortunately I did not get a picture, but it definitely was not my best work.  I am still learning the art of cake decorating) with the cream cheese frosting was amazing!  I even froze the leftover slices between parchment paper and it still tastes amazing.

IMG_9021

For the coconut cake, I actually didn’t have enough eggs and chose to make a buttercream frosting.  To me, it made the cake.  Italian butter cream is not sweet enough to me and this cake wasn’t a very sweet cake so the coconut buttercream filling (just butter and powdered sugar with imitation coconut) was a great addition.

IMG_9016

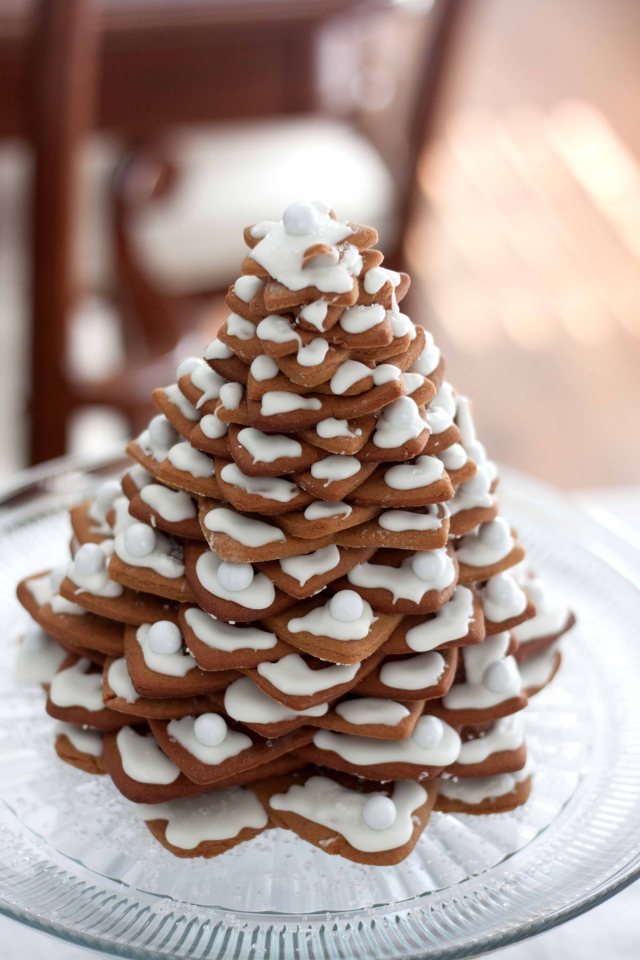
The most challenging dessert had to be the gingerbread star tree.  I used the King Arthur recipe for the cookies.  OMG, it was so hard coordinating the sizes.  I mean how was I supposed to know how many of each I should have and a couple of stars didn’t make it so that was awesome.  The ginger cookies dipped in white chocolate was a fan favorite.

IMG_9025

I have to say, I was pretty burned out after the level of baking required for this event.  The good news is it was short lived and the even better news is that I actually finished everything in time.  That is the bonus of holiday parties, the decorations are already up.

IMG_9030

I definitely outdid myself with this event and the best part is seeing the kids faces while they gorge on delicious dessert prepared by your truly.  I definitely set the stage for a very Merry Christmas.


Cleaning & Cocktails


IMG_1729

I know! I know! I have been M.I.A and what happened to my 35 week challenge you ask… life!  Life happened and there was nothing I could do about it but accept that I had, once again, challenged myself to an unattainable level.  I will say, however, with the exception of a couple of weeks, I have been baking up a storm.  The major challenge has been to transfer my pictures to the desktop and edit them and then proceed to write up a reader worty blog post.  I assure you, I will get those delicious, Pinterest board delicacies on my post but for now I will leave you with a quick recap of my latest endeavor.

After begrudgingly attending a friends Norwex party, I found myself walking back to my car with a baggy of freebies in my hand, an order receipt in my pocket, and contemplation in my mind as I had purchased products and volunteered to host a party.  The clever consultant, Jennifer, both lured me with her excellent presentation and played to my hosting obsession.  Fast Forward to a few days after  my friend’s party and I  not only had a theme for my party but an catchy title as thought up by Jennifer The Consultant (Thanks Jen…I didn’t even ask her if I could call her that)….”Cleaning & Cocktails”.  Oh be still my hosting heart.

IMG_1719

Unfortunately in the middle of planning, I had a life situation happen that distracted me and took me out of town away from my children for the first time.  I actually ended up returning only four days from hosting day.  So you know what that meant, last minute shopping and running behind.

IMG_1734

On the day of the party, I was really limited in my time.  I was fortunate enough to have baked my cupcakes two days in advance and tossed them in the freezer (I can never thank the baker who posted this tip in a thread).  Anyway, I will tell you one thing that has come out of all of this baking and cooking, I am getting pretty fast.  I think I am ready for one of those speed baking cooking shows.  In the morning, with my kids running circles around me, I was able to prepare a mint chocolate mousse (post to follow….at some point), mint flavored whipped cream (homemade), tart crust and shrimp bruschetta topping.

IMG_1725

Since I had little decorating time, I chose to buy four gold balloons and instead of wrapping the gift boxes containing the most amazing coconut cupcakes I have ever tasted (oh yes I am boasting about something I made and you will be as well should you try it out) with gold ribbon I had purchased, I used the gold marker with which I decorated the mirror in the drink bar area to write a simple “Thank you!” and it looked pretty cute.

IMG_1727

I was so behind, I was plating up dishes when guests arrived so the pictures are few and poorer quality than my usual and I even put Jennifer The Consultant to work on prepping the caramelized onion tartlets.  She did an amazing job by the way!

IMG_1737

IMG_1736

In the end, the turn out was enough to make me smile and the food had everyone including myself eye rolling.  You know what I mean…when the only response you can muster when savoring every bite of a delicious piece of food is just a slow roll of the eye.

IMG_1723

Top all of that off with yummy wine and Moscow mules and I was a happy girl.  I had almost forgotten someone was selling something in the middle of all of this.

IMG_1733

A special thank you to all my guests and a special special thank you for your purchases.  I made it to some freebies!  Who could ask for anything more!!!

IMG_1728

35 Weeks of “Pinteresting” Baking: Week 7 – Franken Pie

For shame!  I am so behind on my posting that it should be a crime.  In all fairness, I baked two last week and then just could not post.  Why do I put so many challenges on myself, I could not tell you.

This week I attempted to make a dessert for Father’s day.  I planned on making apple pie since that is the favorite of my husband and my father in-law (if I add the vanilla ice cream.  On baking day, I ended up not having any apples so I opted for a pie with whatever a had remaining in the house.  In this case it turned out to be random berries, raspberry, strawberry, and blueberry to be exact.  I had a recipe for mixed berry hand pies so naturally I decided to use that recipe, but without the hand part.  I wanted it to be a full on pie because that just looks fancier.  Also I call it Franken pie because, for some reason, it took several links to get me to the actual recipe from the link I have on my Pinterest board and I am pretty sure in the end I just meshed together a few recipes that I viewed while trying to confirm my actual Pinteresting recipe was legit.  I also used the streusel from this recipe since I opted against a double crusted pie.

IMG_8753

IMG_8755

IMG_8756


I was unstoppable.  I made my fancy crust and utilized the techniques I learned (e.g. use the rolling pin to gather the dough and place over the pie plate).  I rinsed the fruit which, in itself, looked so gorgeous.

IMG_8750

IMG_8760

IMG_8763

IMG_8766

I was on a roll!  I mean, I made two desserts in one day and had this gorgeous pie.  Oh yes, I was full of myself…..for a moment.    I even tried to use the stressel recipe instad of just adding a top crust.

While driving on the back roads on the way to Oma and Opa’s house, I noticed some liquid forming on the surface of the pie.  “That’s weird”, I thought to myself and like a bolt of lightning, it hit me…Holy sh*@, I forgot the flour.  I totally forgot to add flour to the filling.  I cursed myself all the way to the in-laws.  All that freakin’ work.  All of that self-gratification gone!  It was so liquid like, we totally ended up depending on it being an ice cream topping.

IMG_8774

There is a light at the end of the tunnel.  The flavor of the crust (to which I added an extra tablespoon of sugar) was superb and the berries tasted like heaven.  I want to make this one again with the, you know, correct ingredients.  It is definitely worth a try!

35 Weeks of “Pinteresting” Baking: Week 6 – The Little Oatmeal Cookie Sandwiches That Could

I mentally prepared myself to start this blog post off with yet another baking fail.  When I took the cookies out of the oven, they were super flat and appeared discolored.  I was even embarrassed as I knew I had to post and confess my defeat.  Not to mention the fact that I am a week overdue.  Scratch that, it is now two weeks overdue.  This challenge I have given myself has definitely proven to be a….well, a challenge, but I am not giving up!

IMG_8715

I chose this dessert because I kept seeing the beautiful image staring at me while perusing my board.  It was kind of nostalgic as it brought up memories of the white rectangular box that housed my favorite individually packed Oatmeal cookies sandwiches.  I am pretty sure we had an everlasting supply in my house.  I even had them on hand in my dorm room when I went to college.  Fast forward to several years later and a maturing palate and I now see a poison sign whenever I look at that box so you can imagine it brought me excitement to be able to get a childhood treat made with ingredients I can pronounce.

IMG_8701

This time I did cheat a bit and recruit my mini bakers to balance wild boys and attempting to pump out yet another baked treat.  They are becoming pros now as the oldest has been helping me bake for about 4 years and my youngest for almost 2.  We started off with the cookie portion which was quite easy.  I cannot tell you why they came out so flat and discolored, but I think I let the butter sit out too long and that may explain the flatness.  I opened a new box of baking soda so it wasn’t that.  Regardless, this was definitely a “don’t judge a book by its cover moment.

I “tested” one of the cookies and had a moment.  The cookie was so soft and flavorful.  It really felt like it was melting in my mouth.  I would definitely attribute the texture to the molasses.  You don’t really taste it but it makes sure its presence is known by creating a cookie that seems to almost massage your teeth as you chew.

IMG_8722

I was pretty exhausted when it came to creating the filling so I just cut a hole in a ziploc bag and went to town.  I also need to note that I did not use bourbon or brown the butter.  I know I know, don’t fall out.  I missed that it was browned butter as that is usually  highlighted in the recipe description and I refuse to purchase alcohol at the ABC stores.  I just added 1 tablespoon of vanilla and used plain butter.

IMG_8727

IMG_8735

They were so good, there was almost no final product to capture.  I had to leave the last few at my in-laws so I would devour every single one myself.  This is definitely going down in the books as a go to treat.

35 Weeks of “Pinteresting” Baking: Week 5 – Brown Butter White Chocolate Chip Cookies w/ Macadamia Nuts

Say that 5 times in a row without getting tongue time.  Last week I was so proud of myself as I did not wait until the end of the week to bake.  I had my cookies ready for co-workers by Thursday.  Of course, I managed to delay posting until Week 6 so you will hear from me twice this week.

For week 5 I used Pinterest as an inspiration to create a Franksteinesque recipe for my favorite cookie.  I honestly cannot tell you what I like more, the smell of browning butter or that smokey taste it lends to baked goods, but I am definitely a fan.  The original recipe on my Pinterest is for Brown Butter Cinnamon Cookies with White Chocolate Chips, but I wanted to add macadamia nuts and omit cinnamon chips.  Oh and I did not have sour cream or greek yogurt so I was pretty much destined to go off script.  I ended up combining the aforementioned recipe with a general White Chocolate Chip w/ Macadamia nut cookie and I ended up with a recipe that looks something like this:

2 1/4 C AP Flour

3/4 C Light Brown Sugar

1/2 C Granulated Sugar

1 Large egg + 1 egg yolk

1 tsp Baking Soda

1 tsp Vanilla Extract

1/8 tst Almond Extract

1 tsp Baking Soda

1 C Butter

1 C chopped macadamia nuts roasted

1 pkg Ghiardelli White Chocolate Chips


First I browned the butter.  I removed it from the heat, let it cool and then placed in the freezer for quick chilling.  Once the butter was ready, I creamed the butter and the sugar.  Ohhh it smelled so good!  While that mixed, I combined the dry ingredients in a separate bowl.  I added the dry ingredients to the creamed mixture with the blender on low.  To add the nuts and chips, I used a wooden spoon.

IMG_8247

For the chips, I recommend Ghiardelli.  They are amazing and yes, yes there is a noticeable difference.  If those are not on sale, Nestle is the way to go.  I refuse to go generic on the chips, but funny thing is I will go generic on everything else.

IMG_8257

When I decided to prepare this recipe late in the evening, I threw my hands up when I found that the dough needs to chill for a couple of hours.    It was around 10:00 pm and I had to go to work the next morning so I opted for overnight.

When I took the mix out of the fridge in the morning, I was concerned the cookies would be dry and not soft because that dough was so challenging to handle.  I am sure I was supposed to bring it near room temperature first, but time was limited.

IMG_8241


IMG_8259

The cookies turned out great.  My idea to roast the nuts didn’t quite back fire, but I will say, the nuts stole the show so be sure your audience likes the taste of nuts before you give this a try.

IMG_8265


35 Weeks of “Pinteresting” Baking: Week 1 – Caramel Pecan Carrot Cupcakes

 Since the very first moment I was sucked into Pinterest, or shall I say suckered, I have been “pinning” (well now it is “saving”) my heart away.  I don’t remember exactly when I started, but I do remember how.  A friend just mentioned, “You can use it to promote your blog” and I was sold.  I have more than 10 “Boards” and more pins than I care to mention, but the one thing I don’t have is justification.  What was the point of finding these things online and tagging them to then show up online in another form?  Why was I not doing anything with the Pinteresting findings (oh yes, I plan to wear that word out).  Well after months and months and months of saying I was going to do it, I decided to really make an effort to actually put my pins to use and, of course, without a doubt, my favorite board is Baked Goods That Inspire.  To be fair, though, I have made use of quite a few of my pins, but I barely scratched the surface.  So here is the challenge I set for myself:   for every week for the remainder of 2017, 35 weeks to be exact, I will attempt to bake one item from my board.  From the easiest pins to the items that I am pretty sure I pinned for visual inspiration aka something I knew I could never ever bake (this should be fun).  I plan to go through the ups, the downs, and anything learned along the way.  I hope you will join me on this adventure with all the laughing, crying, and eating that will inevitably ensue this ambitious undertaking.

For my first week (please note I got sick so I am a week behind posting but I promise I made these last Saturday), I started with Caramel Pecan Carrot Cupcakes.  Oh yes, start drooling now.  You will likely note that most of my 35 are cupcakes, but I am really trying to be daring.  Cupcakes are so perfect, they are the new black.  I mean, they have been upgraded from kids parties to an elegant display at weddings.  And what, I say what, could be better than a carrot cake in cupcake form?

fb9002a3e3db9f7cdc5a4be93ad9f2fb

The image above that was capture via my pin made it all the more appealing.  The timing of my first week was perfect, because it coincided with my friend, Tana’s birthday.  I followed the recipe exactly except I have always refused to use premade caramel and after you make your own, you will as well.  It is so easy.  Here are a couple of recipes I like to use:

http://www.simplyrecipes.com/recipes/caramel_sauce/

http://www.epicurious.com/recipes/food/views/caramel-sauce-105889

This time I was so tired and in a hurry, as usual, I just threw ingredients into a pot.  Now let’s get into the tips I used and the few things I learned doing research as I am so trying to improve on my cupcake.   They often end up dense. You know, how it stays in your throat a tad bit longer than you’d like forcing you to need liquid to go with it.

  1.  Remember to bring your ingredients (incl. egg and butter) to room temperature for even bakingIMG_7566
  2. I use a 1/4 measuring cup to scoop up the batter to get even cupcakes.  Everyone has their own ideas from cookie scoop to weighing on a scale (I roll my eyes at that one)
  3. When using batters with fruit or additions that have water in them, add them last when you are ready to go right into the tin.  If it sits, you’ll add water to the batter.IMG_7561
  4. Spray the surface of the pan with non-stick spray for those pesky muffin tops that may spill outside of the cupcake paper.
  5. I only partially used this one, for batters with a lot of filling, fill all cups half way and then go back and fill the rest.  The is designed to eliminate the fact that by the time you get to the last cupcakes, all the good stuff is gone.IMG_7569
  6. Don’t leave the area – I like to try to do too much and ended up over-roasting aka burning the first batch of pecans.  Yes, I threw away a million dollars.  That may be an exaggeration, but nuts are expensive!  (Costco does have the best pricing).IMG_7560
  7. For frosting, put your bag into the tallest cup/vase you can find and insert the bag into the vase.  Fold the ends of the bag over the edges of the cup/vase and you have a quick and mess free way of filling your bag.IMG_7574
  8. For the whirly style frost I did hear, I used Wilton #1M and you put heavy pressure while squeezing and swirling around the top and slowly pull up.  Yeah, that makes sense.  Don’t worry, you can youtube it.IMG_7576IMG_7578

I had also read that you have to find the right recipe.  I initially scoffed at that one thinking, “if you are a good baker/cook, you should be able to make anything”, but after making this recipe I see.  I think maybe some recipes are not designed correctly.  Oh yes, the internet tricks us (gasp!).  I have followed recipes and have been like ew, but this one turned out amazing!

IMG_7580

I followed the recipe and didn’t deviate beyond the caramel and it was heavenly.  Oh and I used dried dates instead of raisins because raisins look like grapes that have gone bad and been poisoned.  I hate raisins! Sorry, I just am not a raisin kind of girl.  The texture, the flavor, everything was fantastic!  You have got to try this one!  I would definitely say my first week ended with a success and a very happy birthday girl.

Mail Order Meals?

Before I even get into my evaluation, I have to just say right out of the gate, it is, without question, more expensive than shopping for ingredients yourself.  There, mystery solved.  If that is what is holding you back from trying out one of the slew of food delivery companies trending in the world, then read no further.  Now, for those who still want to make sure or for those who have money to spare I may be able to give you a little tiny bit of insight.

Thanks to some very generous subscribers, I was able to try both Hello Fresh and Blue apron at little to no cost.  And let’s be honest, that would be the only way I would ever try something that I deemed a luxury for the wealthy.

IMG_7242

Let’s start with Hello Fresh since that is the first service I used.  I had a $79.99 coupon and decided to get the Classic Package for a family of 4 for 3 meals for the entire week.  I ended up having to pay an additional $39.99, but for what I was getting that felt almost free.  I opted for a Saturday delivery and when the FedEx truck met me in my garage, I literally squealed and jumped like toddler getting ice cream.  I assume it looked funny because the driver laughed at me.  Once the truck drove off I found I was still holding the box in the driveway checking to see if my neighbors could see me (Note: the box is clearly labeled with the Hello Fresh logo) as I wanted the world to know, I was receiving food from a meal delivery service like the fancy people.

IMG_7246

When I tell you they spare no expense with their packaging, I mean I would have been sold without tasting a bite.  It seemed so elaborate and organized, I felt like I was on Life Styles of The Rich And Famous for a moment.  I mean really it was like I had been transported to The Real Housewives.  Before you laugh and judge me, there is something to be said about how a product makes you feel.  I genuinely felt special and glamorous handling the Hello Fresh items.  Not to mention, the packaging fits perfectly and neatly in the refrigerator.

HF2

Now, before I tell you about the taste of the meals, let me get rid of a few more curiosities…if you are not one that enjoys cooking, move along.  This product is not for you.  And I will tell you, making grilled cheese, boiling a hot dog or even making basic spaghetti would not qualify you.  These meals force you to really cook, I mean making and working with foods you may have never even heard of before.  I think it would even challenge the culinary gifted.  Let me be clear before everyone runs for the hills.  It is not too challenging for one that cooks often and cooks a variety of different types food.  Another point to take into consideration is that you also need a lot of supplies (cutting, chopping, and dicing required), but they do cover you on all of the ingredients.

HF1


HF3
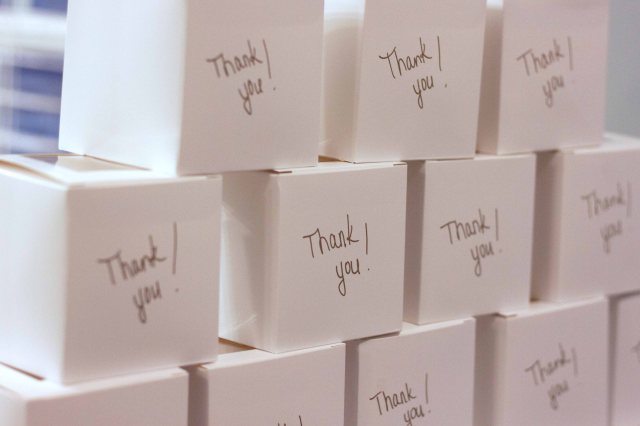
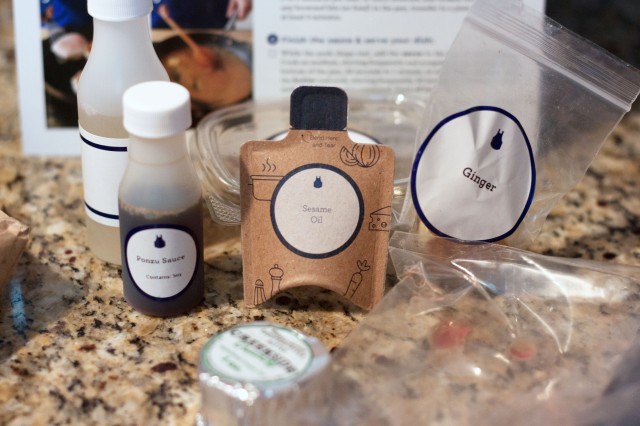
Now for the results…drum roll please…holy shamoly everything was amazing!  Even my picky monsters loved 2 out of 3.  When I plated the meals I remember thinking, “Oh snap, when did we hire a gourmet chef” and the best part was I didn’t have to spend hours searching for new recipes, listing the ingredients, and then shopping for them.  Another big feature for my tendency to be messy when cooking is it is so much easier to keep the food organized and neat due to the smart packaging.

The one final aspect for which I must prepare you, are the portions.  If you need a diet and still want variety, look no further than a mail order meal.  There are no leftovers and depending on how deeply imbedded into America’s new cultural food portions, you may find yourself snacking before bed as you will be sure to not overeat without stealing a family member’s portion.

Overall, Hello Fresh received two thumbs up on quality, presentation, variety, and user friendliness of their website.


Now on to Blue Apron which I wish I tried first so I would not have had such a high standard and ultimately end up with a skewed view.  I mean, I already wanted a user friendly website, many food options and pretty packaging.   Unfortunately that was not exactly the case.  I had to ask for help on how to convey we could neither have seafood nor peanuts.  I also couldn’t figure out the food options.  Eventually I was able to order and, I was once again excited.

IMG_6581

The food arrived in a nice box, but upon opening the package, I was not greeted with perfectly organized and sorted boxes.  The produce were all jumbled together with the exception of the seasonings and extras which were in clearly labeled brown paper sacks.

IMG_6574

It did also come with the very picturesque recipes similar to Hello Fresh.   I did like how their seasoning and liquids packaging was premeasured which added major value.  You would just open a container and pour it all in.

IMG_6577


IMG_6588

Now for the review, the first two meals were delicious and my husband made one, sticking directly to the recipe (trust that was a smart move on his part) and it still came out fantastic.    When we got the 2nd set of meals arriving, it was very similar to the previous meal as it had the same meats.  One of two of those were really really really delicious, but the other was just o.k.

IMG_6596

Blue Apron is $70 for a family of four for 2 nights or $140 for 4 nights, but there is no 3 night option.  Hello Fresh has dropped their price to $119 for 3 nights of meals.  So overall, it is not that much cheaper than Hello Fresh.

Before I go on and on, because you know I love talking about food, I will leave you with my final overall review of this new craze.  I think this is an amazing concept and clearly developed by someone or some people who found a way to capitalize on a need that may have otherwise gone unnoticed.  This is not for a family on a tight budget.  It is not for a family that has a culture of making one pot meals and it is not for a family who barely has time to eat let alone cook.  Who then, is it for you ask.  I think it is for those families that have a significant grocery budget.  I think it is for power couples without kids and I think it is for financially sound singles that have a distinguished palette, a love for cooking and little time to go out to eat or plan fancy meals.  The best utilization of these mail to order meals would be a power couple getting the 2 to 3 days of meals for a family of four package and using that extra two meals for leftovers and then eating out for the rest of the week or doing  a simple salad or grilling a non-MTO meal (oh yes, I did create my own acronym) days.

I must say, I did get a phone call from Hello Fresh and got reeled in for a bi-weekly family of four meal package.  I am excited and ready with an Excel table for comparison (Hello Fresh v. Grocery store).  I know that it is more, but it is delicious, healthy, and gives me back my time to bury myself in other work.  Whether you call it a splurge, a necessity, a working mom’s savior, it is definitely a something worth a conversation.

A Party You Can Eat.

Christmas is not only the time to decorate obnoxiously or pretend like all of a sudden you can sing like Mariah because it is a Christmas song, but it is also for treats treats treats.  I mean I am sorry, but Halloween candy has nothing on the myriad of delightful yummies that come out doing our country’s favorite holiday. And what goodie is most associated with Christmas…….if you guessed a gingerbread house, then you are correct!  I mean, come on, a house made of food?  What else is there?

img_4873

Of course I turned what could have been just a simple, sweet moment of decorating the little house with my boys into a mad house of loud, wild, school aged children hopped up on sugar; twenty-one children to be exact.  What was I thinking, obviously I wasn’t.  But you know what, it actually turned out great  thanks to the amazing moms that helped me out (Kristi, Sarah, Michelle, Stephanie C.,  and Nicole).

I have been wanting to do this for a couple of years now ever since my neighbor Sarah invited my eldest to her daughter’s gingerbread party.  I had it all planned out and the best part about the whole thing was the decorations were already there (you can see my blog post on Christmas decorations).  I just needed tables, chairs, and the tools for the houses.

I went with the simplest method and the least amount of gingerbread aka graham crackers possible, 4 per house.  Some people online chose to use hot glue to assemble their house, which is likely more efficient and stable, but on the slight chance that some “Curious George” would try to eat the house I decided it would be better to go with the traditional Royal icing (you can find the recipe on the container of meringue powder or you can buy pre-mixed which can be found on Amazon).  I started with the pre-mixed, just add water package from Amazon, but it was used up quite quickly so I went old school (powdered sugar and meringue powder).   Because I needed so much of it, I copied the Amazon packing idea and pre-made the dry mix the night before and put it in Ziploc gallon bags and just added water as needed the next day.

img_4870

A few tips:

  1.  Royal icing dries out quickly so keep it covered in plastic or be prepared to keep adding water.
  2. To fill the baggies, place baggie in cup and fold over edges.
  3. Tie baggies in knot and don’t cut the corners until right before the kids are ready to start decorating
  4. Royal Icing can be made as thin as a glaze or thick as glue so add water slowly when you want it in glue form which is the case for this project
  5. You can put the icing on a plate for assembling the houses and just dip the edges of the graham cracker into it. (That idea came from my mother in-law who helped me knock 24 houses out in no time.  Thanks Oma!)
  6. If they don’t look perfect (who cares really) you can add extra icing to the flawed edges and just call it “extra snow”

img_4871

I also made 2 – Ingredient homemade hot chocolate and white hot chocolate (that wasn’t ready until after guests went home).  Just chocolate morsels and milk.  O.k. o.k. I added vanilla and a bit of powdered sugar because I used semi-sweet chocolate chips.

img_4885

img_4887

It was so amazing watching those kids take to decorating like architects.  I mean they were no joke.  I am pretty sure 60% of the children made houses that would make mine look like a child did it.  Then, of course, there were the kids who were building a house in their stomachs.  It was a fun site.  I decorated the table with my favorite go to construction paper roll which I have had for 3 years.  And let’s just take a moment of silence as this event pretty much finished my roll…………..o.k. silence over.  I used that last little bit of some leftover wrapping paper as a runner and it added a candy cane seal to my simplistic layout.

img_4916

img_4914

Finally, who would I be if I had a party without baked goods.  I found some amazing recipes on my Pinterest and in my newest obsession, Southern Living.  I made 3 different types of cookies, one of which was fancy and cursed myself when I began adding the fine detailed holly to that cookie (it was really delish) and totally hijacked a batch of sugar cookies Oma made for my children (Oma saved me again!).  As a prize for eating and decorating with candy, they got cookies!  Oh yeah, I sent kids home on a cloud made of jumping jelly beans. It was a wonderful sugar-filled day.


*Photography by Stephanie Chesboro


Christmas Exploded In My House and It’s Not As Expensive As You Think

img_4671


At this point the Christmas decorations are pretty much done and unless I manage to create some magical wormhole where I am able to freeze time and just sit and create some additional holiday designs to add to my house, I am very unlikely to add anything else.  But that’s o.k. because I walk through my house every day like a kid in an FAO Schwartz inspired candy store (does that exist?).  It is so well deserved because this was a year in the making.  Oh yes, I had to wait a whole year to finally get my Christmas explosion.

img_4676

Christmas 2015 I moped through my rusty box of decorations that had been purchased through the years at the dollar store or some scrap bin and I didn’t spend a dime.  O.k. well maybe a dime.  I was uninspired and unenthused, but it was all for good reason.  I knew as soon as the holiday was over and those 60%+ off signs went up at my favorite go to stores (Michael’s, Target), I would knock over grannies to get what I want.  And that is exactly what I did.  No, I didn’t really knock over grannies but I huddled over my cart like a little old lady as I sped through aisles of decor from Christmas past.  I mean I was buying things I never thought I could because there was no way in hell I was spending some of those crazy prices on ornaments or garland, but at 70% off it was more my budget.

img_4673

img_4688

Let me just tell you, this is no sprint.  You have to be willing to go back for a week or more as they drop the prices each week.  I got things for as low as 80% off.  I was even able to purchase decor from Kirkland’s.  I am telling you, it was so worth it to wait.  I mean my house looks like I am one of those, no offense, crazy people that spend a fortune on Christmas decor and I spent only slightly more or the same as if I went shopping in the bargain bin at a discount store.

img_4629


As you can see my Rustic mind is still going strong.  I wanted to stick with that style so I have a lot of green and burlap.  And do not forget about the chalkboard.  I think I ended up getting those mini trees for $1 each from Target once they went down to $1.  Oh yeah, I recall now.  I took every single tree on the shelf and was walking away and a woman freaked out (she was like actually fussing) because she must have seen them before I got there.  I totally hid and ran off with my steal.  It was hilarious.

img_4630

img_4564

So, if you want your home to look like Santa’s workshop but don’t have a basket ball wives’ budget just hold strong, stick with your minimalist Christmas decor this year and attack those shelves after the holiday and in one year, with patience, you will have the holiday home of your dreams.

img_4682

img_4579

Enter a caption

img_4670

Enter a caption


img_4680

I am so proud of this tree.  It is pretty full for my standards and the ornaments were cheap pricing but not cheap quality.

img_4645

img_4637

img_4635

img_4649

img_4695

My First Rustic, Elegant, Spooky, All In The Name of My 6 Year Old, Halloween Decor

Last year my eldest son noticed Halloween decorations on the front door of our neighbor’s aka classmate’s aka friend’s house and shortly thereafter, the complaints began.  “When are we going to put our decorations up?  Why don’t we have any Halloween decorations?”  What I wanted to say was “When pigs Fly”,  “When that money tree I planted starts to fruit”?, but instead, I chose to put out a couple of cheap things from the dollar store just to keep him quiet as I don’t typically do Halloween decorations.  I don’t like the scary aspect of it for my kids and it can be…well…just creepy.  This year, I found a way to appease my child and kind of stick with my anti-evil Halloween by deciding to do bat-spider-black themed decor.  I mean, bats are a real thing and so are spiders and so they are not really spooky spooky and, well, black is just a color that looks cool.  Thanks to the Dollar Tree and Target’s $1 and $3 bins (although they have recently started sneaking in a $5 bin thinking I wouldn’t notice), I made a creation that could get anyone in the Halloween spirit.

img_2707

img_2759

I love recycling.  The black birds are from the Dollar Tree and that beautiful manzanita branch is from our wedding.  That piece is so versatile.  The spider web-like material is something I bought for my son’s kindergarten Halloween party.  It is supposed to go on a table, but since there is no decoration police, I chose its place as I saw fit.

img_2718

I contemplated  removing my coat rack with all those coats distracting me then I realized if I removed the coats and covered it with a white sheet, it would serve as a ghost without really being a ghost so I refused to put eyes (at my kids and husband’s suggestion).

img_2735

img_2781

The October 31 chalkboard sign was an idea I copied from the internet.  My freehand game is improving big time!

img_2762

img_2754

I got so into the spirit, I swapped out my rustic picture frames for black frames sitting in my closet and framed Halloween-themed clip art printed on plain white paper.  I gave my self a pat on the back for that freebie piece of decor.

img_2767

img_2713

This was definitely one of my most surprising decoration outcomes as I did not really plan it out and there was no stress involved.  I am even pretty sick so I  was dragging around moping as I finished off the final touches.  What started off as more of an obligation became a bit of a passion project that kind of left me in awe.  Happy Halloween!!!!

img_2768